If you're looking into residential floor coatings, one of the most important steps you can take is proper surface preparation. Learning how to prepare concrete floors for coating isn't just a good idea—it's essential. Get this step right, and you'll enjoy a smooth, durable finish that looks amazing for years. Skip it, and you might end up watching your hard work peel away before your eyes.
Key Takeaways:
- Proper surface preparation is the foundation of a long-lasting concrete floor coating.
- Cleaning, inspecting, and testing your floor helps coatings bond better and last longer.
- Etching or grinding creates the texture coatings need to stick properly.
- If the prep seems too complex, calling a pro can save time, money, and stress.

Why Concrete Floor Preparation is Important
Before you even open a can of coating product, the state of your concrete floor will decide how well that coating performs. Coatings don't stick to dirt, grease, or loose particles. Without proper preparation, your hard work could chip away—literally—in just a few months.
Think of your floor like a canvas. If it's dusty, oily, or uneven, your paint won't go on smooth or stay put. A little time spent on prep saves a lot of time and money in repairs later.
Step-by-Step: How to Prepare Concrete Floors for Coating
Before you start applying any coatings, follow these essential steps to make sure your concrete surface is clean, dry, and ready to bond properly.
1. Clear and Clean the Area
Start by removing everything from the space—this includes tools, furniture, vehicles, and any clutter that might get in the way. A clean, open area allows you to work efficiently and safely. Once the space is clear, sweep thoroughly to eliminate dust and loose debris. Pay special attention to corners and edges where dirt tends to accumulate.
Next, apply a concrete-safe degreaser to scrub away any oil spots, grease, or chemical stains. These contaminants can interfere with coating adhesion, so be thorough. Rinse the area with clean water and allow the surface to dry completely before moving on.
2. Inspect for Damage
Take a close look at the entire surface for any cracks, holes, spalling, or uneven areas. These imperfections can compromise the adhesion and performance of your coating. For minor cracks and chips, use a high-quality concrete patching compound that's specifically designed to be compatible with floor coatings.
Deeper damage may require a more robust repair product or even resurfacing. Follow the manufacturer's instructions carefully—especially regarding drying and curing times—to ensure a smooth, stable surface that's ready for coating.
3. Test for Moisture
To check for hidden moisture in your concrete slab, cut a piece of clear plastic wrap or a heavy-duty garbage bag into a square about 2 feet by 2 feet. Tape all four edges tightly to the floor to create a sealed pocket. Leave it undisturbed for at least 24 hours.
After this period, inspect the underside of the plastic. If you see any condensation or water droplets, it means moisture is migrating up through the concrete—a serious issue that can prevent coatings from adhering properly. In that case, you'll need to investigate and resolve the moisture problem before proceeding with any floor coatings.
4. Etch or Grind the Surface
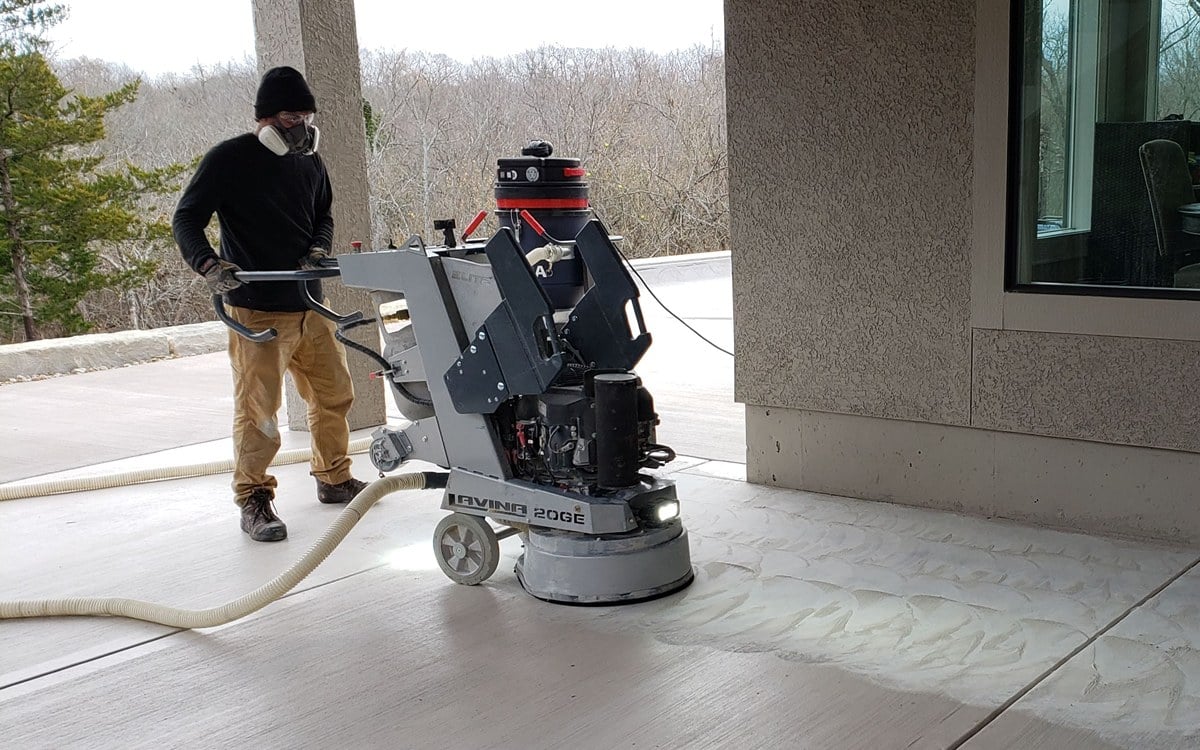
Etching with a mild acid solution or mechanically grinding the surface is essential for creating a rough, porous texture that allows coatings to adhere properly. Etching uses a chemical process to lightly corrode the top layer of concrete, removing contaminants and opening up the pores. Grinding, on the other hand, uses a machine with abrasive pads or discs to achieve the same effect more aggressively and uniformly.
Both methods increase the surface profile of the concrete, giving coatings something to grip onto. Without this step, the coating may sit on top of the surface rather than bonding with it, leading to peeling, bubbling, or premature failure.
5. Vacuum and Final Clean
After grinding or etching, it's essential to thoroughly remove all the dust created during the process. Use a powerful shop vacuum to clean the entire surface, paying extra attention to corners, joints, and any textured areas where fine particles can accumulate.
Once the dust is removed, mop the floor using clean water to pick up any remaining residue. Avoid using cleaners at this stage, as they can leave behind films that interfere with coating adhesion. Allow the floor to dry completely.
When you're done, the surface should have a uniform, slightly rough texture—similar to medium-grit sandpaper. This ensures optimal bonding conditions for your chosen floor coating.

When to Call the Pros
If your concrete is badly damaged, shows signs of significant moisture intrusion, or if the preparation process feels overwhelming, it's always best to consult with a professional. Flooring experts have the tools, products, and experience to assess the condition of your floor, correct underlying issues, and apply coatings with precision. This not only ensures a durable, attractive result but can also save you time, frustration, and potential do-overs if something goes wrong during a DIY attempt.
Final Thoughts
Learning how to prepare concrete floors for coating is the key to a successful DIY floor upgrade. Take the time to do each step right, and you'll be rewarded with a beautiful, durable surface that holds up for years.
Ready to upgrade your floors? Don't leave your concrete coating project to chance! Select Coatings is here to make it easy. Our friendly team offers expert advice, top-tier products, and service you can count on. Best of all? We'll give you a free, no-pressure quote so you can make the right choice for your space.
Give us a call at 913-349-6689 or reach out online today to get started!


